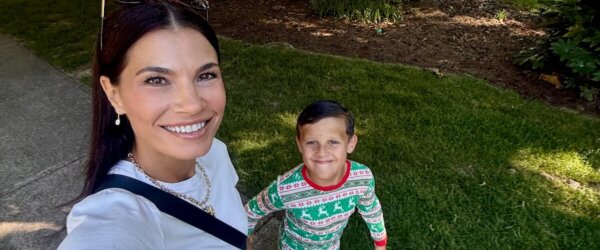
Only two more fourth trimester posts to go! 11 weeks has been so much fun and I know that it’s only going to get sweeter and sweeter as Finn’s personality continues to grow and shine.

While we are in no way “out of the weeds” when it comes to the all things new baby, I am starting to see the light. Finn isn’t on a predicable schedule yet but we are in a really good rhythm with eat, play, sleep. I’m following his cues when it comes to sleep and hunger. At this point no two days really look the same but I do feel like he’s on the way to getting himself to a more routine schedule soon, with help from me in reading his needs.
One of the biggest things I have learned is to try to get him to sleep (both naps and for the night) when he’s first showing signs of being tired. Once he crosses the line into REALLY tired, oh boy, it gets about a million times harder to get him settled and down!
I know everyone has a different style when it comes to babies but for me, following my intuition and Finn’s lead has worked really well for us so far.
Okay, you know how I told you guys that Finn “found his voice” at the 10 week mark? Well it’s just the cutest thing ever and I had to share a video.
What is it with babies and fans!? It’s the craziest thing.
Fourth Trimester: 11 Weeks Postpartum
Breastfeeding: I did a call for blog post topics on Instagram and received quite a few requests for a post on breastfeeding. If that’s something you guys want to know more about, I’m happy to write about it but let me know if there are specific things you want me to cover or if you just want to hear my overall experience and goals.
I did start pumping last week and it went well. I got 3-4 ounces each time I pumped but OUCH. My nipples are very sore from pumping. It feels like the early days of breastfeeding again. Any tips?
Also, it’s World Breastfeeding Week! Check out my post on Instagram in honor of it!
 Sleep: the biggest sleep issue right now is me dealing with insomnia after nighttime feeds. I don’t really have a hard time falling asleep but when I wake up to feed Finn, I’m having a REALLY hard time going back to sleep. This morning I went ahead and just got up for the day at 5:15 a.m. because my mind was racing and I felt wide awake.
The only thing that has really helped is reading a few chapters in my book on my Kindle when I’m lying there awake. It helps calm my mind and will often make me sleepy again. I’m trying to stay OFF my phone in the middle of the night.
Physical well-being: with every week that passes in the postpartum period, my body feels more and more like “me” again. I’m feeing strong in my body and I’ll go into that in more detail when I talk about workouts.
Emotional well-being: this last week has been rough with the transition back to Charlotte after being with my family but every day is getting better. The days can feel long and lonely but I’m doing my best to find gratitude for all of the things that are good and right.
One thing that I’m really trying to make an effort to do is work on friendships with other moms here in Charlotte. I’m lucky to know quite a few other amazing ladies who are also new/newish moms and I’m focusing on growing and nurturing those friendships.
And as far as how I’m doing overall with the entire situation…not great but I’m taking it one day at a time. It’s difficult to reconcile how vastly different this period of my life looks and feels in comparison to what I hoped my experience of new motherhood would be. And there is just a lot to figure out. I wouldn’t wish this on anyone but I also draw strength from the many women who have walked this path before me.

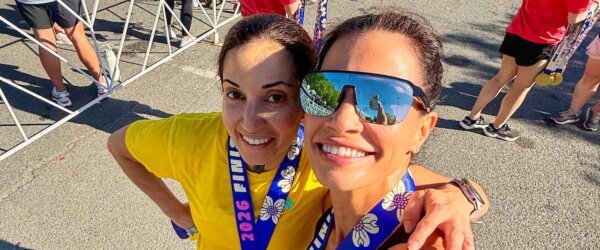
Workouts: it’s like a switch went off in the last week and all the sudden I have the urge to RUN and it feels so good. I haven’t felt any discomfort around my incision and so far it seems not to impact my supply but I’ll continue to monitor that closely.
I’m not super motivated to go to the gym and the thought of attending an actual yoga class is not appealing right now (enjoying being a bit of a hermit in that regard) but I’m glad to be running, doing some bodyweight exercises and home yoga practices.
Here’s what last week looked like:
Monday: 3 mile walk
Tuesday: 3.5 mile run + short upper body workout
Wednesday: home yoga practice
Thursday: 3.1 mile run
Friday: 3.75 mile run + 1.75 mile walk
Saturday: 2.75 mile walk
Sunday: I’m going to do another short run and walk the dogs after I publish this post
Questions…
Tips for making pumping more comfortable? Favorite pumping bra?
Did running or other workouts impact your supply?
Any baby-related post requests? I’m going to do one about finding my pump and starting to use it, my newborn must-haves and a more holistic post on postpartum fitness. Oh and I also need to write my c-section physical recovery post. Let me know if you have anything to add to the list!