Happy Easter! I hope that you’re all having a lovely Sunday whether it’s full of Easter festivities or just enjoying a nice spring day. Things are pretty quiet around here. I always miss my family on days like this but luckily I have a trip booked to see them soon.
Today is my blog’s birthday! My TimeHop told me that I started this blog seven years ago today. I just checked my WordPress dashboard and saw that I’ve written over 2,100 posts since that first one which equates to about 300 a year and nearly six per week. That’s a lot of blogging. Whether you’ve been with me for a month, a year or since the beginning…thank you for reading! What a journey it’s been. <3
Last Week’s Eats
Breakfast

I only have one breakfast photo because I kind of got stuck on smoothies. I’ve been all about my favorite basic “PB&J” combo of frozen bananas, berries, a date, spinach, homemade almond milk and lots of peanut butter.
Lunch

Lunches were a little more interesting. Salad with spinach, arugula, tomatoes, sliced almonds, dried cranberries, avocado, strawberries and deli turkey with a sesame ginger dressing.

Turkey sandwich with melted goat cheese, arugula, dijon mustard, avocado and mayo.

Grain blend topped with dinner leftovers along with a dollop of hummus and slices of avocado.

Arugula dressed with olive oil and lemon juice then topped with a grain blend, avocado, dried cranberries, turkey, pistachios, tomatoes and hummus.
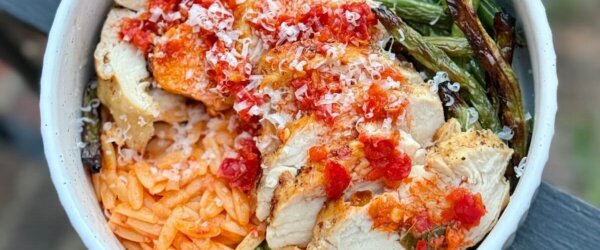
Dinner

Blue Apron seared salmon with lemon labneh over freekah with kale and dates. This was good! Here’s the recipe.

Another Blue Apron dish with a fontina stuffed pork chop with roasted potatoes and a pizzaiola sauce. I also added some sauteed spinach on the side for something green.

One pan roasted dinner with chicken apple sausage, butternut squash, brussels sprouts and baby portobello mushrooms.

I topped mine with hummus and a drizzle of balsamic.

One night I got sucked into the vortex of work until like 9:30 so I just made a quick turkey sandwich for dinner.

Sourdough, mayo, avocado, turkey, goat cheese and Chef Alyssa’s champagne tomato jam.

Pan roasted chicken with roasted potatoes and carrots.
This Week’s Meal Plan
Sunday: Dijon maple glazed spiral ham with roasted carrots, spinach salad and biscuits (you cannot have ham without biscuits)
Monday: Crispy Peanut Tofu & Cauliflower Rice Stirfry (I’m going to use a big head of broccoflower that I have)
Tuesday: Slow Cooker White Chicken Chili
Wednesday: I’ll use the leftover ham to make some sort of quiche or fritatta with a salad
Thursday: kimchi, grains and greens bowl with a fried or poached egg (loosely based on this)
Friday: Leftovers
Saturday: Postmates or go out
And that wrap’s it up!
Again, happy Easter and all my gratitude and appreciation to you guys for hanging out at my little corner of the Internet! 🙂
What did you eat for Easter brunch, lunch or dinner?
How long have you been reading PBR?
How did you initially discover my blog?